
External Function Development Guide (Python 3)
Goal
This guide helps developers learn how to write External Functions in Python to process data in Singdata Lakehouse.
Important Notes
Environment Setup
Given the usage constraints of External Functions described above, the following specific requirements and recommendations apply to the development environment:
-
No third-party library dependencies: If your Python script does not depend on any third-party libraries, simply ensure the code follows the code structure specified below and can execute correctly in a Python 3.10 environment.
-
With third-party library dependencies: If the script requires third-party libraries, those dependencies (and their binaries) must be compatible with the Python 3.10 ABI (x86_64 architecture).
Code Structure
The code structure of a Python function consists of the following parts:
- Import module: Required. Must include at least
from cz.udf import annotateto import the function signature module so that Singdata Lakehouse can recognize the function signatures defined in the subsequent code. - Function signature: Required. Format is
@annotate(<signature>), wheresignaturedefines the data types of the input parameters and return value. See the appendix for more on function signatures. - Custom Python class: Required. The organizational unit of UDF code that defines variables and methods implementing business logic. You can also reference third-party libraries or file/table resources in your code.
- evaluate method: Required. Located inside the custom Python class. The
evaluatemethod defines the input parameters and return value. A Python class can only contain oneevaluatemethod.
Installing Third-party Libraries
Using the download of httpx and pydantic as an example, use the following command to download the dependency packages to the directory where the main program file is located (current directory in this example):
Uploading Functions
Upload, Zip Package Upload
Only applicable to functions whose packaged size is under 500 MB. For packages over 500 MB, refer to the later section: Creating Functions Using a Container Image.
Package the program files, dependency library files, or model files in zip format (currently only zip format is supported and must be under 500 MB), for example:
Upload code.zip to cloud object storage and grant the Singdata Lakehouse cloud role access to the corresponding path. The authorization process is not described in this development guide — refer to Usage Guide: External Function. You can also specify an internal volume. Although you can use an internal volume, the code bucket parameter in your API CONNECTION creation must be filled with an external address.
- User Volume address format:
volume:user://~/upper.jar-
userindicates the User Volume protocol. -
~represents the current user and is a fixed value. -
upper.jaris the target filename.
-
- Table Volume address format:
volume:table://table_name/upper.jartableindicates the Table Volume protocol.table_nameis the table name; fill in as appropriate.upper.jaris the target filename.
Image-based Upload
Only applicable to functions whose packaged size exceeds 500 MB or that use GPU resources. Requires Alibaba Cloud Container Registry (free tier).
See the documentation: Practice: Processing Image Data with a Hugging Face Image Recognition Model
Example
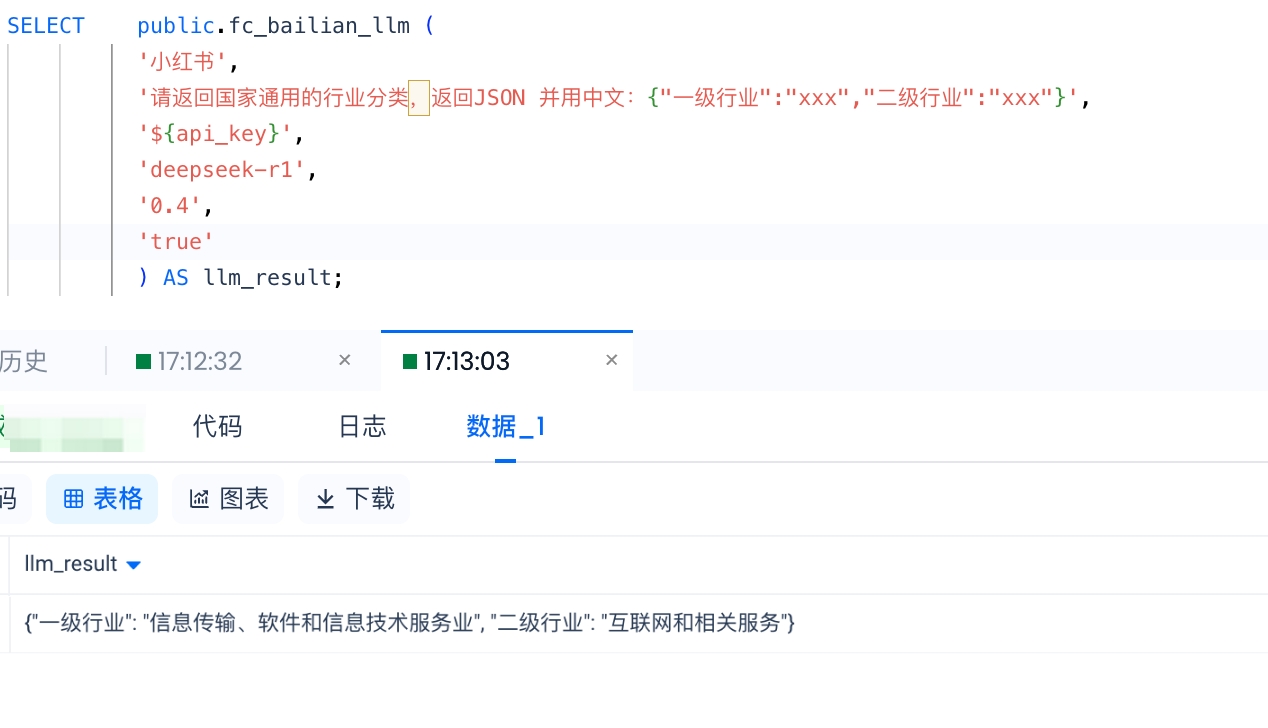
Goal: Use a large language model (LLM) service to fill in the standardized primary industry and secondary industry for each company based on the company name column in a Singdata Lakehouse customer table. The result looks like this:
Step 1: Prepare the Development Environment
-
Install Docker: Ensure Docker is installed locally: https://www.docker.com/
-
Pull the Docker image. Run the following in your local command-line terminal (e.g., macOS Terminal):
-
Start the Docker container. This container is based on the
manylinux2014_x86_64image and is configured to use the Python 3.10 environment:
4. Create a folder named cz_llm under the /root directory:
5. The program code in cz_llm.py is as follows:
Test code:
Step 2: Download Third-party Libraries
The program depends on the third-party package dashscope, which needs to be downloaded. (os, http, json, sys are Python built-in libraries and do not need to be downloaded. cz.udf will be added by the system automatically when the function is created.)
Run the following in the development environment command-line terminal:
The directory structure will look similar to this:

Step 3: Local Debugging
Make the following 3 modifications, since the cz.udf library is not loaded in the current environment:
The API_KEY is the API KEY from the Alibaba Cloud Bailian platform. You need to register an Alibaba Cloud account, log in, and obtain it here: Alibaba Cloud Bailian
After commenting out the two lines above, save and exit the editor. Then run:
Step 4: Package and Upload
Before packaging, uncomment the two lines commented out above:
Run the packaging command, ensuring the current directory is the program directory (in this example, /root/cz_llm):
You will find a cz_llm.zip file in the /root directory. Copy this file to the Lakehouse USER VOLUME object:
Run on the Docker host machine:
Now cz_llm.zip is in the Downloads directory of the host machine's user.
Use the Lakehouse JDBC client (see Lakehouse JDBC Client) to put the file into the Lakehouse USER VOLUME:

Step 5: Create and Use the Function
This step requires you to have created an API connection in advance. See: API Connection
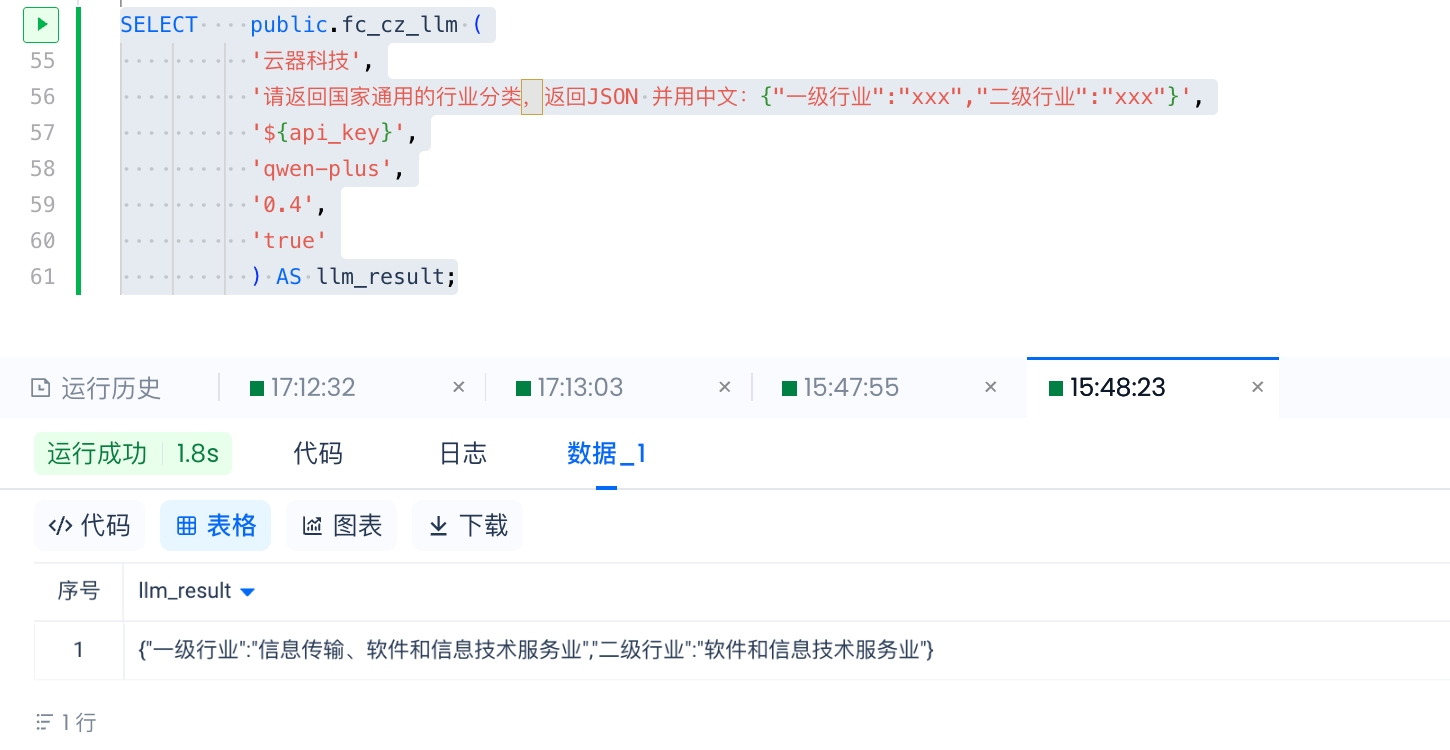
The creation process takes about 1 minute. After creation, run the verification function (note: replace '${api_key}'):
Result:
Appendix
Function Signatures
The function signature format is as follows:
signature is a string used to identify the data types of input parameters and return values. When executing a UDF, the input parameter and return value types must match the types specified in the function signature. During query semantic parsing, any usage that does not conform to the function signature definition will be checked and an error will be reported if a type mismatch is detected. The specific format is as follows:
Where:
-
arg_type_list: Represents the data types of the input parameters. Multiple input parameters are separated by commas (,). Supported data types are: BIGINT, STRING, DOUBLE, BOOLEAN, DATETIME, DECIMAL, FLOAT, BINARY, DATE, DECIMAL(precision,scale), CHAR, VARCHAR, complex data types (ARRAY, MAP, STRUCT), or nested complex data types. -
arg_type_listalso supports an asterisk (*) or empty (''):- When
arg_type_listis an asterisk (*), it indicates that the function accepts any number of input parameters. - When
arg_type_listis empty (''), it indicates no input parameters.
- When
-
type: Represents the data type of the return value. A UDF returns only one column. Supported data types are: BIGINT, STRING, DOUBLE, BOOLEAN, DATETIME, DECIMAL, FLOAT, BINARY, DATE, DECIMAL(precision,scale), complex data types (ARRAY, MAP, STRUCT), or nested complex data types.
Valid function signature examples:
| Function Signature Example | Description |
|---|---|
'bigint,double->string' | Input parameter types are BIGINT and DOUBLE; return value type is STRING. |
'*->string' | Accepts any number of parameters; return value type is STRING. |
'->double' | No input parameters; return value type is DOUBLE. |
'array<bigint> -> struct<x:string>, y:int>' | Input parameter type is ARRAY<BIGINT>; return value type is STRUCT<x:string>, y:int>. |
| '->map<bigint, string>' | No input parameters; return value type is MAP<BIGINT, STRING>. |
Data Types
To ensure that the data types used when writing Python UDFs are consistent with those supported by Singdata Lakehouse, you need to be aware of the data type mapping between the two:
| Singdata Lakehouse Data Type | Python 3 Data Type |
|---|---|
| BIGINT | int |
| BOOLEAN | bool |
| CHAR | unicode |
| DATE | datetime.date |
| DECIMAL | decimal.Decimal |
| DOUBLE | float |
| FLOAT | float |
| INT | int |
| SMALLINT | int |
| STRING | str |
| TIMESTAMP_LTZ | datetime.datetime |
| TINYINT | int |
| ARRAY | list |
| MAP | list |
| STRUCT | collections.namedtuple |
| VARCHAR(n) | str (write fails if over limit) |
| VOID | NoneType |
Development Environment Image Installation
During software development, especially when using Python for cross-platform work or interacting with low-level native code, Application Binary Interface (ABI) compatibility is an important consideration. When your development or deployment environment is a non-Linux system such as macOS or Windows, when the target device architecture is not X86-64 (e.g., ARM-based devices), or when the project uses third-party libraries compiled from C/C++ or other native code, the risk of potential ABI incompatibility increases significantly. To ensure the stability and portability of Python applications, it is strongly recommended to use a standardized build environment to download and compile these third-party dependencies.
Recommended practice: Use the container
For the specific scenarios mentioned — developing on a non-Linux system (such as macOS, Windows), a non-X86-64 device, or using third-party libraries containing native code — to avoid Python ABI compatibility issues, it is strongly recommended to use a Docker container based on quay.io/pypa/manylinux2014_x86_64:2022-10-25-fbea779 to download and build third-party dependencies.
How to proceed
-
Install Docker: Ensure Docker is installed on your development machine: https://www.docker.com/
-
Pull the image:
-
Start the Docker container based on the
manylinux2014_x86_64image, configured to use the Python 3.10 environment:
You can now develop your Python External Function in this environment using Python 3.10.
You should then see the Bash prompt inside the container (the exact prompt style may vary by image). For example, when printing the Python version, it should show the following:
You have now successfully "logged in" to your cz_func container.
Common Issues with the Image
1. Error when installing tools
For example, running yum install zip to install the zip packaging tool may produce errors like the following:
This error occurs because CentOS 7 reached its end of life (EOL) on June 30, 2024, and the official repositories have been moved to the CentOS vault. mirrorlist.centos.org no longer provides repository services for CentOS 7.
The solution is as follows:
First, check that the network connection is working normally.
If the network is fine, update the repository configuration to use the CentOS vault:
Back up the current repository files:
Update the repository URL to use vault.centos.org:
Clear the yum cache:
Now try installing zip again:
If you are in China or vault.centos.org is slow to access, you can use a domestic mirror source:
Use the Alibaba Cloud mirror:
Or use the Tsinghua University mirror:
After making these changes, the yum install zip command should work normally.
2. Copying files between Docker container and host machine
Once you have generated a package, if you want to copy it from the container to the host machine or vice versa, use the following commands:
Copy from container to host machine:
docker cp container-name:container-path host-path, example:
Copy from host machine to container:
docker cp host-path container-name:container-path # Example:
Notes:
- The container can be running or stopped
- You can use either the container name or container ID
- Supports copying both files and directories:
docker cpautomatically detects whether the source is a file or directory
Copy an entire directory:
Copy directory contents:
-
docker cpautomatically detects whether the source is a file or directory -
When copying a directory, all subdirectories and files are copied recursively
-
The destination path is created automatically if it does not exist
-
Difference between trailing
/and no trailing/:/app/logs→ copies the logs directory itself/app/logs/.→ copies only the contents inside the logs directory