Analytics Agent Quick Start
This guide helps you configure Analytics Agent from scratch and run your first data Q&A. After completing it, you will be able to ask questions about your own data in natural language and receive charts and analysis summaries.
The diagram below shows the complete user journey. This guide covers the core steps of Phase 1 and Phase 2:
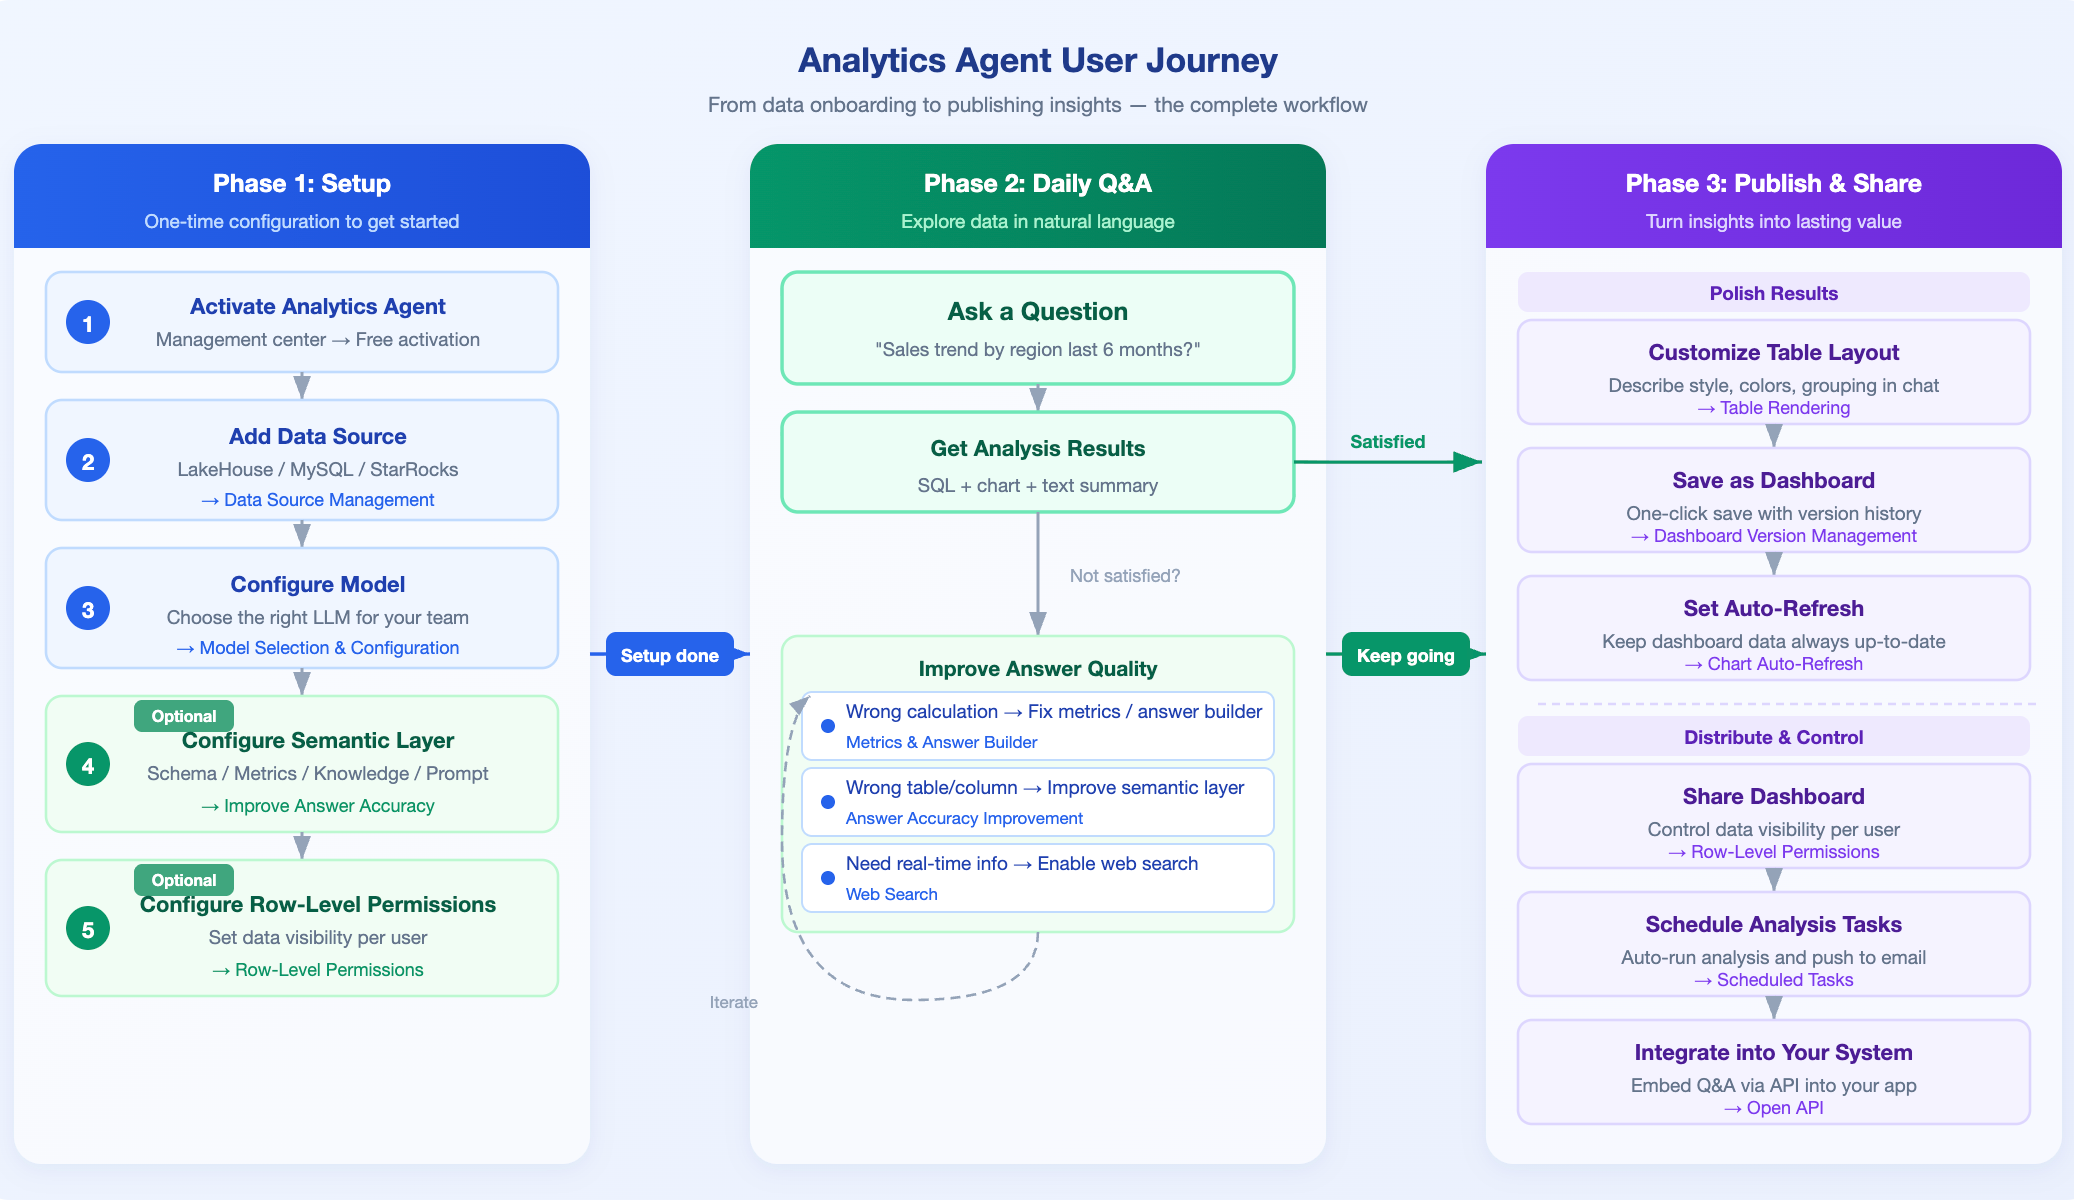
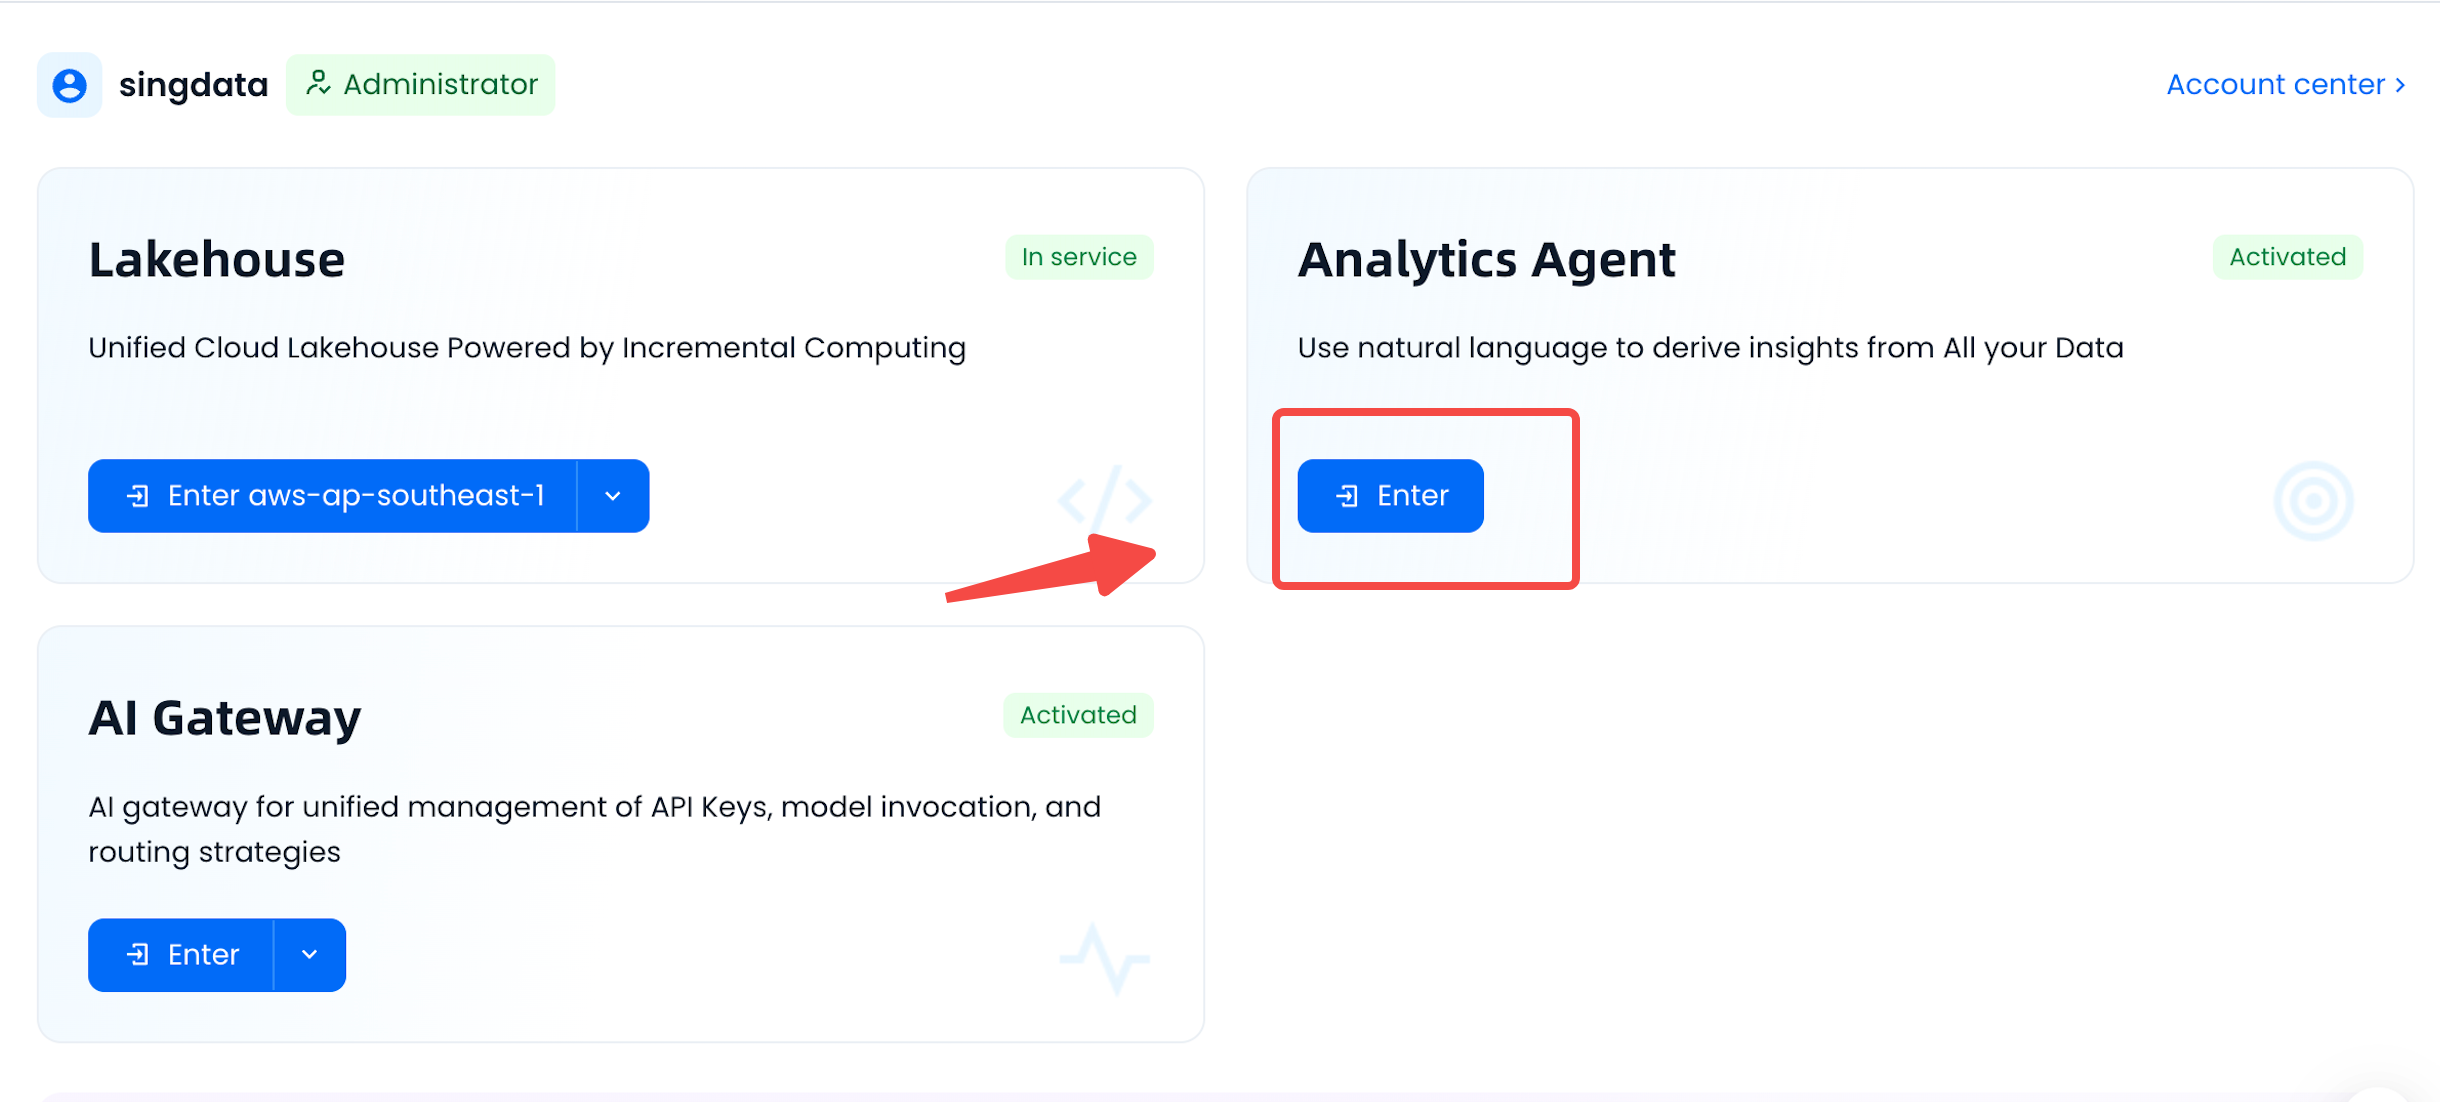
Activate Analytics Agent Service
- Find the Analytics Agent product card on the "Home" page of the management center and click the Activate for Free button.
- In the pop-up window, the cloud service provider Alibaba Cloud and region East China 2 (Shanghai) will be specified by default. The system provides the option "Simultaneously activate a Singdata Lakehouse instance in Alibaba Cloud - East China 2 (Shanghai) as the default data source":
- Check (recommended for new users): The system will automatically activate Lakehouse as the default data source with pre-loaded sample data, requiring no manual configuration.
- Uncheck: After the service is activated, manually add a data source on the data source management page. No pre-loaded sample data will be included.
- Click Activate and after a short wait, you can enter the usage interface.
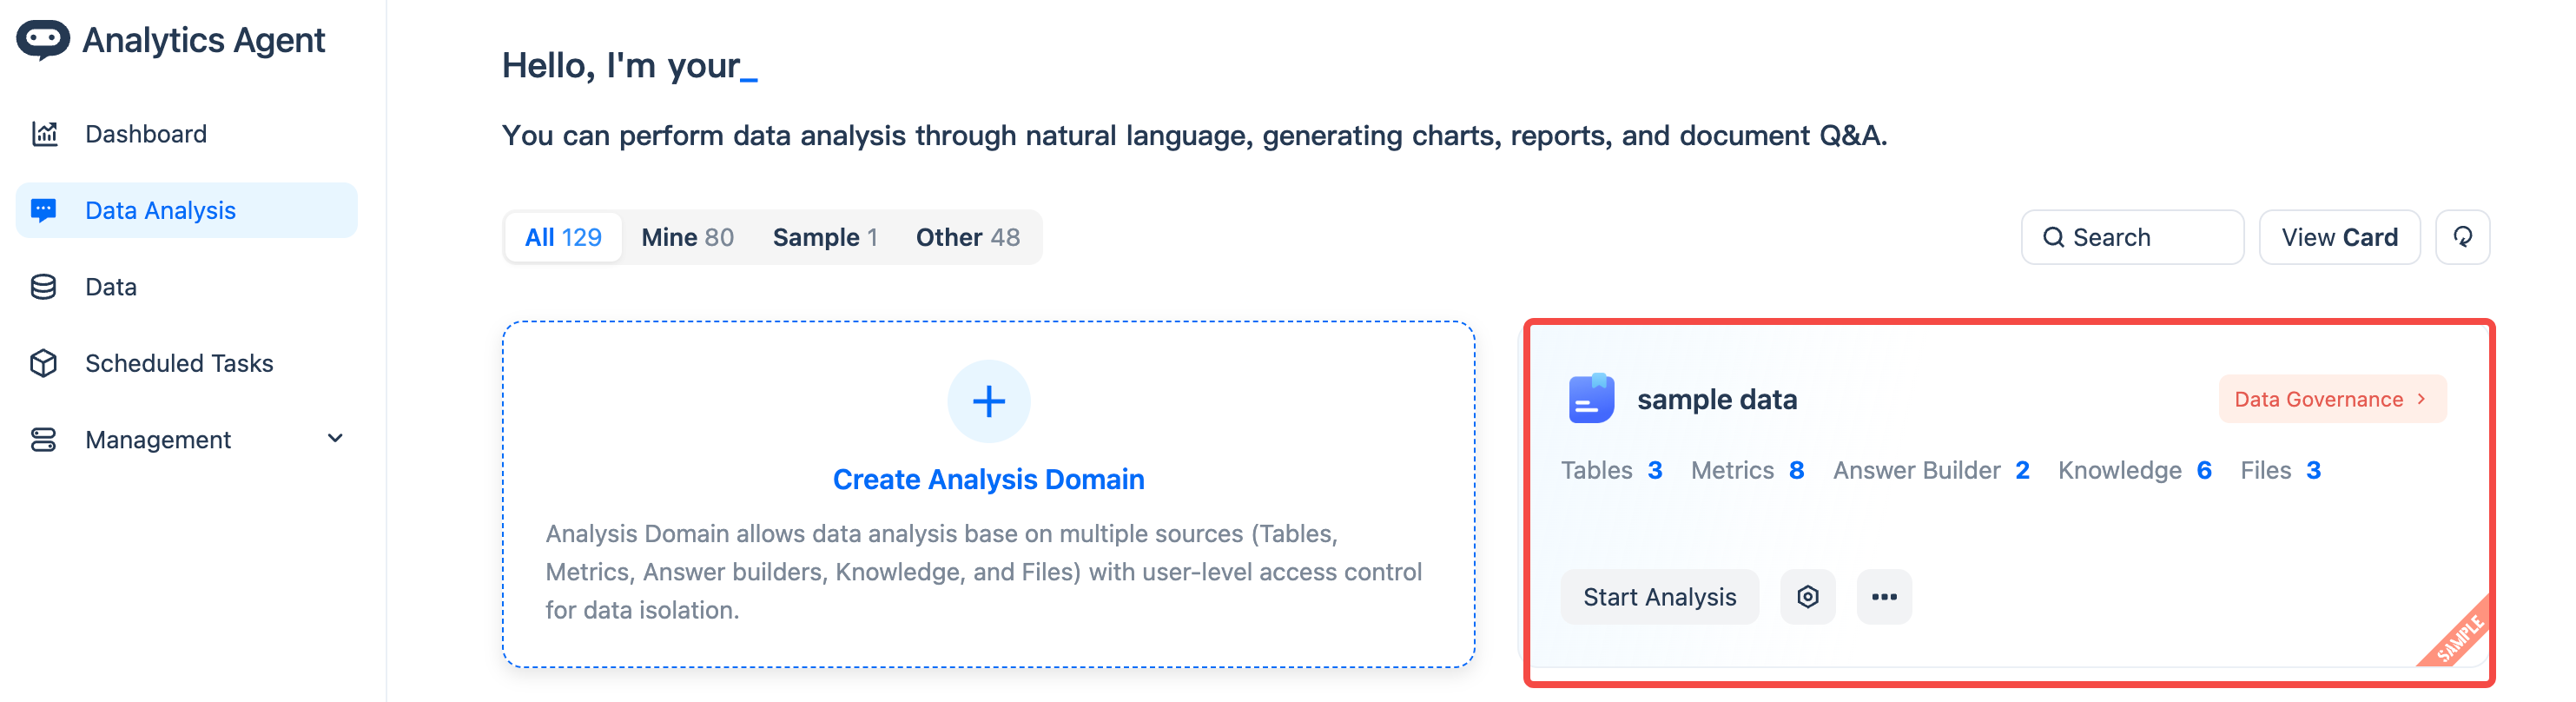
Method 1: Use the Sample Analysis Domain
We have prepared a well-configured sample dataset for you, which includes a complete table configuration and metric system. You can start asking questions directly to experience intelligent analysis. This sample can also serve as a template to help you understand how to build your own analysis domain.
Go to the product home page, find the analysis domain labeled "Sample", and click Start Analysis.
Method 2: Analyze Based on Your Own Data
The system supports importing multiple data formats including CSV, Excel, and PDF. The following uses real data from the Brazilian e-commerce platform Olist to demonstrate the complete workflow.
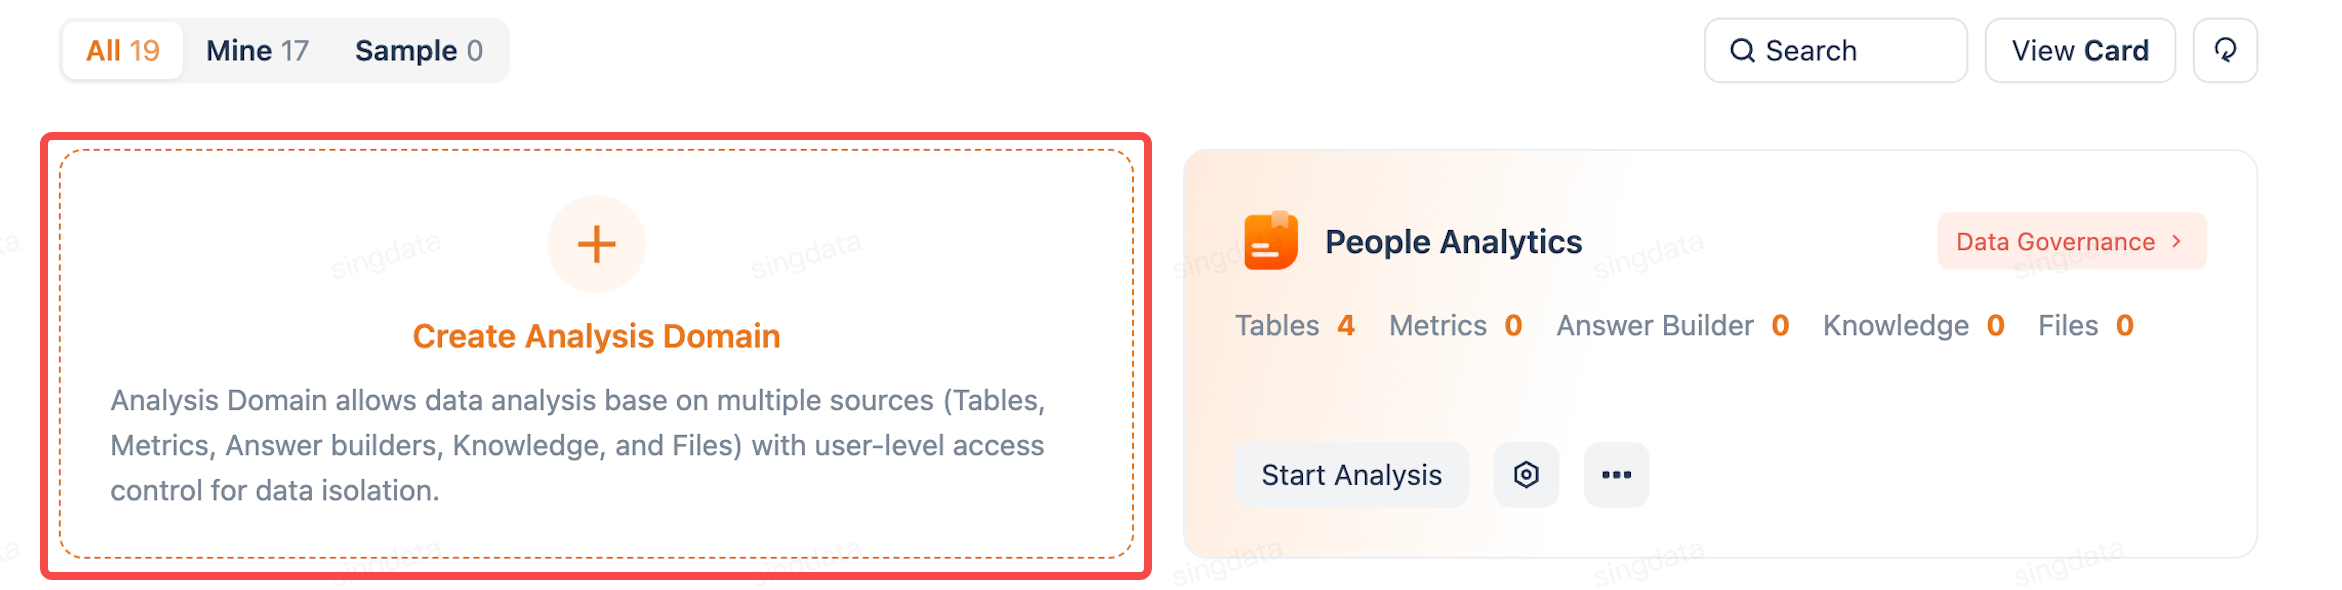
Step 1: Create a New Analysis Domain
Step 2: Basic Configuration
- Analysis domain name: Enter a name, e.g., "Brazil Olist E-commerce Data Analysis"
- Data source: Select the underlying data platform (default is LakeHouse). To connect MySQL, StarRocks, Databricks, or other external databases, refer to Data Source Management.
- Model: The system uses the default model; you can switch at any time on the conversation page. To uniformly configure models available to your team, refer to Model Selection and Configuration.
Leave other options as default and click Confirm to create the analysis domain.
Step 3: Add Data
- After creating the analysis domain, click Add Data → Table, then click Start Adding.
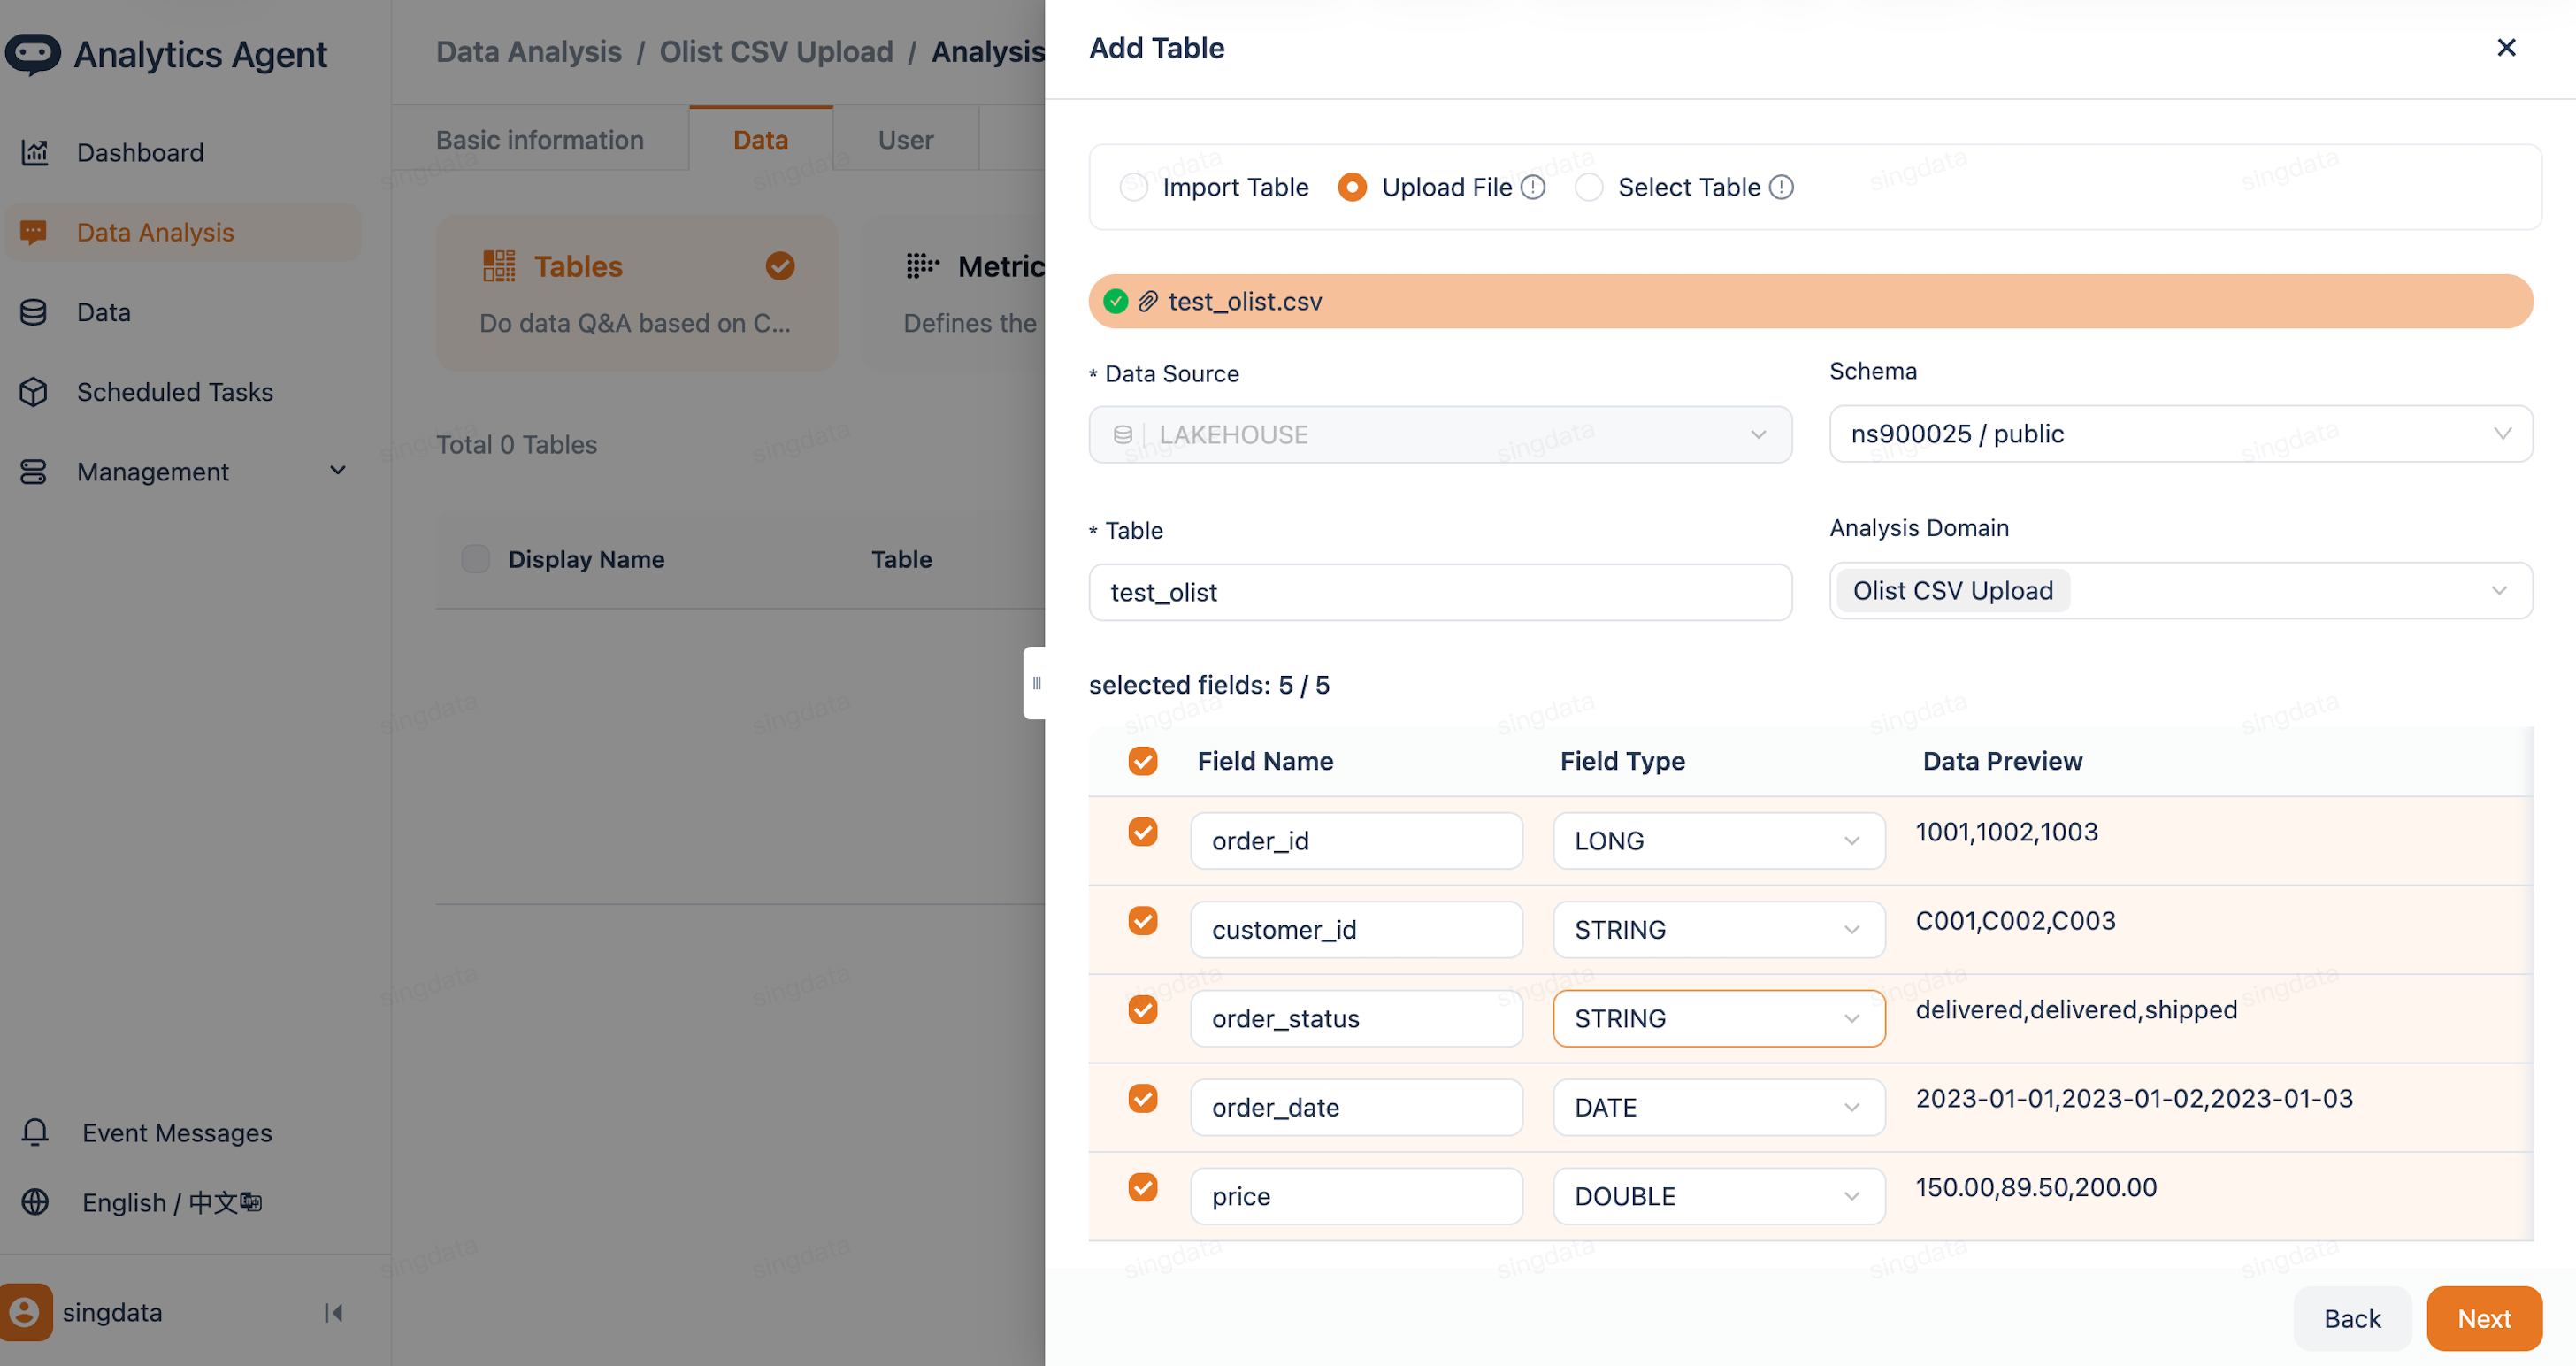
- Select Upload File, add the following data files, and click Next to start parsing.
- Click Next to upload data:
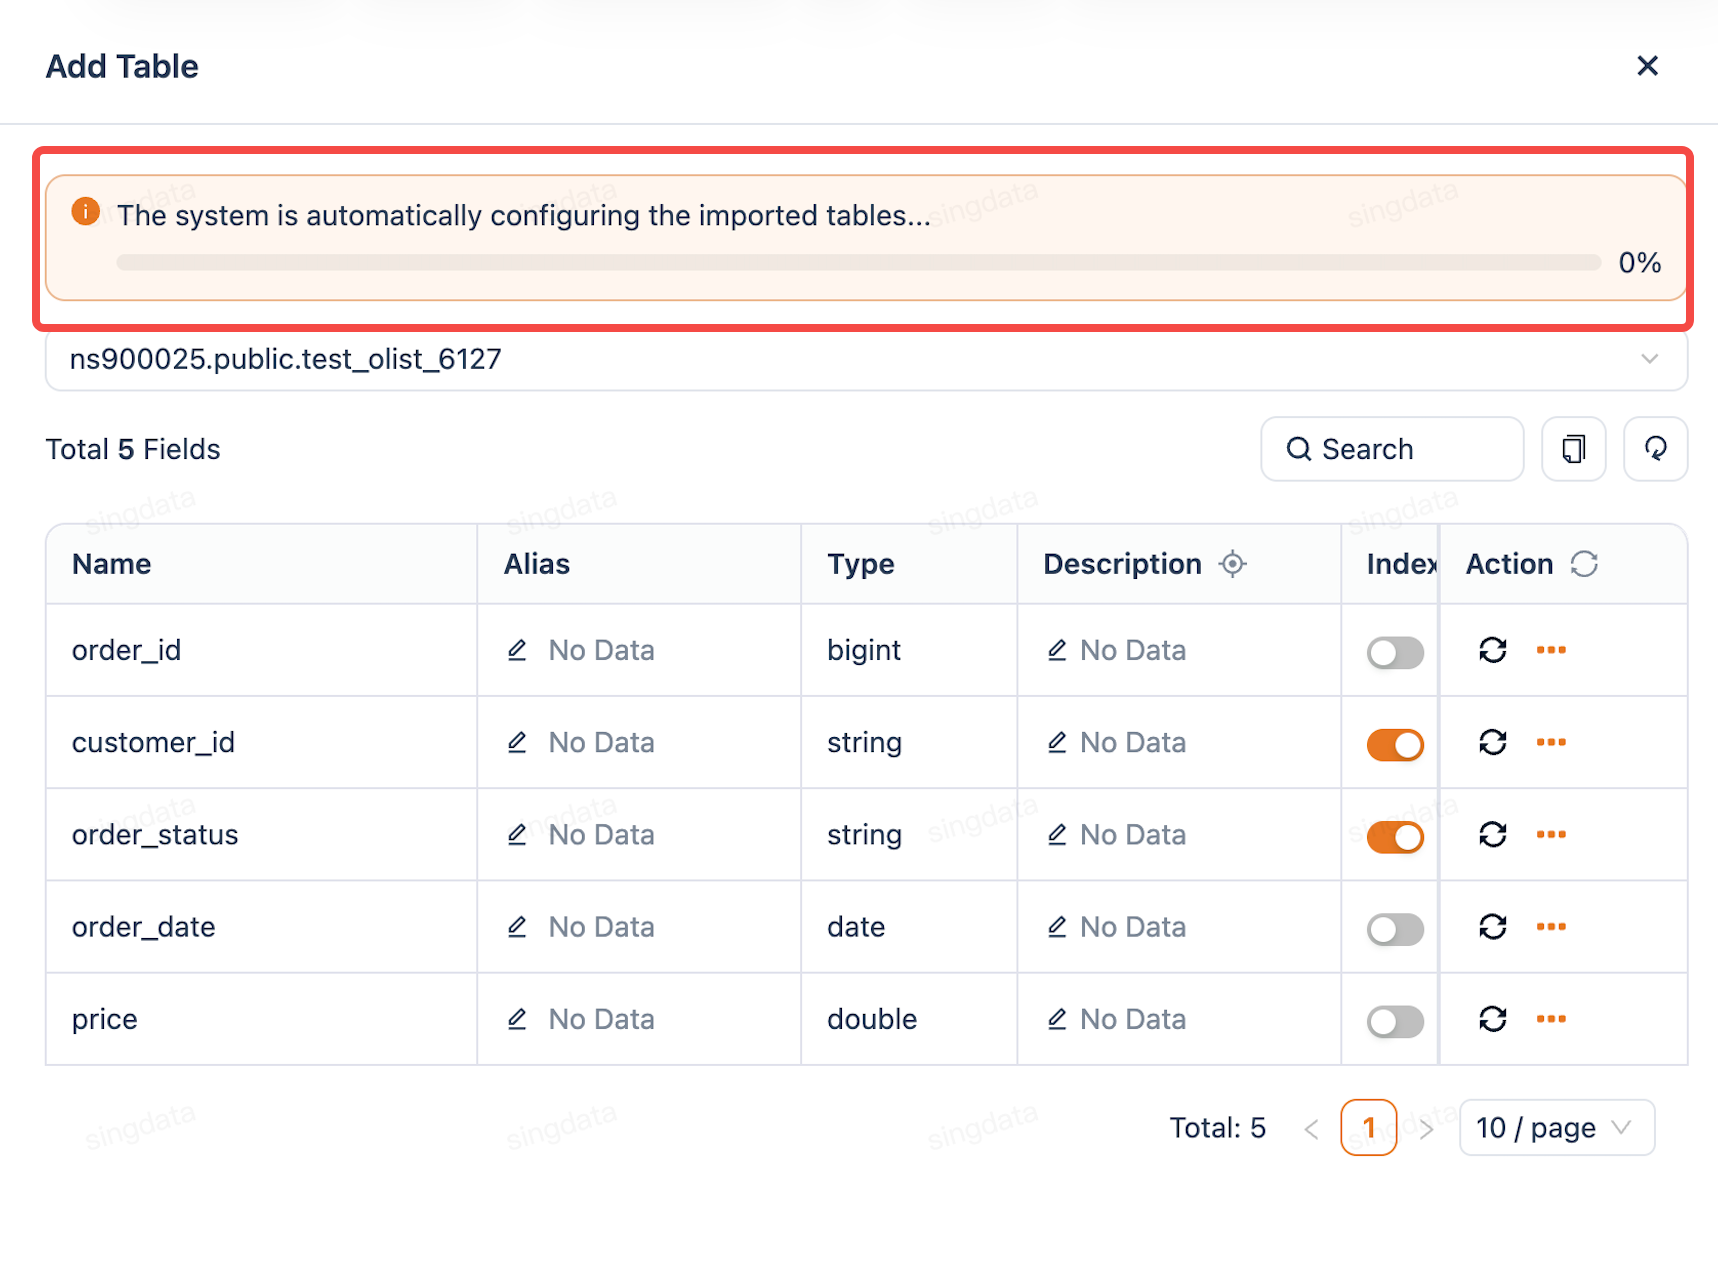
Step 4: Automatic Semantic Layer Construction
After upload is complete, the system automatically analyzes the data and constructs the semantic layer, including column descriptions and aliases, column type recognition, table relationship inference, and basic metric recommendations.
The semantic layer is the foundation for the Agent to understand your data. If you find that Q&A results are inaccurate (e.g., wrong metric calculation or wrong table selected), you can improve the semantic layer to resolve it — refer to Answer Accuracy Improvement.
Step 5: Start Q&A
Once the data is ready, ask questions in natural language directly, e.g., "What is the sales trend by region over the past 6 months?"
After you are satisfied with the results, you can further:
- Adjust table layout: Describe the layout and colors you want through conversation — refer to Table Rendering
- Save as a dashboard: Save analysis results with one click; supports multi-version management — refer to Dashboard Version Management
- Set up auto-refresh: Let dashboard data update automatically without manual refresh — refer to Chart Auto-Refresh
- Set up scheduled tasks: Let the Agent automatically run analysis on a schedule and push results to email — refer to Scheduled Tasks
- Share dashboards and control permissions: Set visible data ranges for different users — refer to Row-Level Permissions
- Integrate into business systems: Embed Q&A capabilities into your own system via API — refer to Open API
Related Documentation
- Data Source Management — Add more types of data sources (MySQL, StarRocks, Databricks)
- Model Selection and Configuration — Switch or configure the LLM used for Q&A
- Answer Accuracy Improvement — Make answers more accurate through semantic layer configuration
- Row-Level Permissions — Set data access ranges for different users
- Open API — Integrate Q&A capabilities into your system